Beverage

Beverage, Gluten Free

{skhisandhers} GIN SPARKLER + OLD FASHIONED

sprouted kitchen

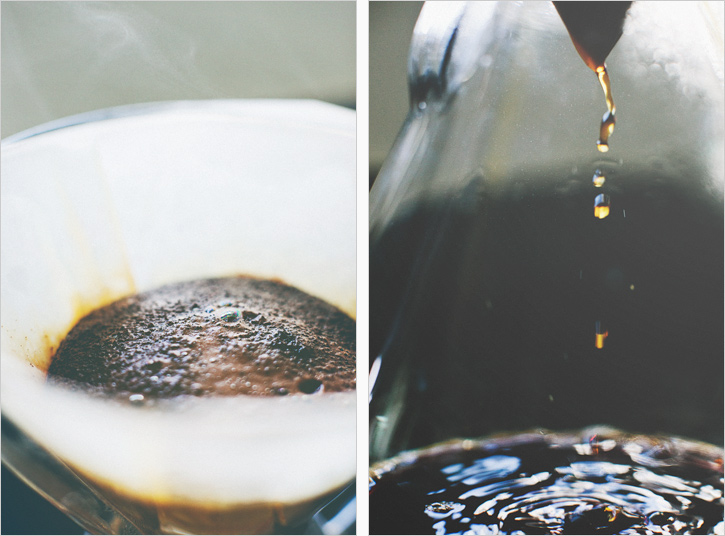
Be it through email, while teaching classes, or during Q+A for some book events, people seem to be curious how I cook and eat with Hugh as our food preferences are a bit different. I can't say I even noticed until strangers started asking. Making two versions of certain foods has become second nature, I know him pretty well, so it doesn't take much extra thought at this point. I made a lentil bolognese yesterday and put mine on a big bed of greens and his on toasted bread with melted cheese... and a mini bed of greens, of course. No need to reinvent the wheel, just tweak it a bit. He likes a sweet breakfast, I prefer savory. He will always choose the burger on a menu, I will always choose a salad. He drinks black coffee, I like a drop of cream. Because others were asking, I started noticing our food preferences and it has transformed into our joke as well as a self-imposed Instagram hashtag - #skhisandhers.

Beer or whiskey are Hugh's drinks of choice. I can't say they're mine, I'm a wine or gin lady myself, so we crafted two drinks that are easy to make individually, or something fun to make with friends as you're ringing in the New Year this weekend. Because gin is an herbal spirit, I wanted something that I could work just a bit of rosemary into. I poked around my favorite sites and remembered Heidi posting a gin cocktail a while back. Found it! It was exactly what I was looking for and her photos are always quick to convince. The cocktail is perfectly sweetened, easy on the eyes, and just the thing in the throws of citrus season when the oranges are sweet and juicy.

sprouted kitchen

GIN SPARKLER // Makes 1

Recipe from 101Cookbooks

I prefer the slightest wisper of rosemary taste, so I made a small amount of the rosemary syrup, enough for 4ish drinks. If you think you'd like more of that flavor or want the syrup on hand, triple the recipe. Heidi says it keeps for about a week in the fridge. 

  • // rosemary syrup //
  • 1/4 cup natural cane sugar
  • 1/2 cup water
  • 1 heaping Tbsp. rosemary leaves
  • 3 Tbsp. gin
  • 3 Tbsp. fresh squeezed and strained blood orange juice
  • 1-2 tsp. rosemary syrup
  • sparkling water, lemon sparkling water or tonic

To make the syrup, put the sugar, water and rosemary leaves in a small pot. Simmer the mixture for about 3-5 minutes, stirring occasionally. Remove from the heat and let it infuse about ten more minutes. Strain the mixture and set aside.

Fill a tall glass three quarters of the way with ice cubes. Garnish the insides with thin slices or blood orange or rosemary sprigs if you'd like, just be sure they sit under ice cubes so you're not getting furry rosemary in your mouth. Add the gin, fresh juice, rosemary syrup and top it off with the sparkling water. Add a dash of this or that to your taste and cheers!

sprouted kitchen

Hi folks. This is Hugh.

Often times I am a creature of habit, and that is certainly the case when it comes to ordering cocktails. The Old Fashioned (bourbon) is my go to. That being said, I've had some really good versions (simple, pure) and some really bad versions (too much bitters, half an orange, mystery mixer filling up the glass), and there are few drinks less enjoyable than a poorly made Old Fashioned... maybe that mason jar of green "juice" Sara brings home every once in a while from the yoga studio in the harbor... I dunno. Anyway.

The version below is based off of an Old Fashioned I had at the Tasting Kitchen, a spot that knows their cocktails. This is a very simple drink, and as with most things you'll find on Sprouted Kitchen this simplicity can shine through using good ingredients. Find some bourbon or rye whiskey that you enjoy, Angostura Bitters, some fresh citrus and you're off to a good start.

OLD FASHIONED // Makes 1 

  • 1/8 - 1/4 tsp. sugar
  • Angostura Bitters
  • orange
  • lemon
  • ice (I leave a couple ramekin-sized tupperwares filled with water in the freezer for Old Fashioned purposes)
  • 1 1/3 ounces of bourbon or rye whiskey

Add just a pinch of sugar, between an 1/8 and a 1/4 teaspoon. Hit the sugar with two splashes of bitters (the image below looks like more than that, as the bitters had time to bleed around the cup while I reached for the camera, so if you're following along and measuring visually, it shouldn't look like that much). Add orange and lemon peels, about 2 inches each, and muddle with the sugar and bitters. Add the ice and whiskey, and stir thoroughly.

sprouted kitchen
sprouted kitchen
sprouted kitchen
Print This Recipe

Beverage

COFFEE . A CHEMEX METHOD

CHEMEX_0001.jpg

Hey there. This is Hugh. Please proceed accordingly...

About a year ago we did a post about how we brew French Press coffee. Unfortunately, in the inexplicable way of the internets, that post no longer exists. You can still find the video over here, but the bits of information found in the post are no longer with us. That being said, I'll recap a few of the pertinent points in this entry, but the good (no, great) news is that in just a few weeks, there will be a new and incredible coffee resource available. We are lucky enough to have some wonderful friends at 10 Speed Press, one of whom sent us an advance copy of the forthcoming Blue Bottle Craft of Coffee book (Thanks Ali!) by James & Caitlin Freeman, and Tara Dugan, and oh man, is it something. If you take your coffee seriously, you need this book (and if you don't take your coffee seriously, you need this book).

I've been earneslty experimenting with a few different brewing methods for about 3 years nows, and it's only been in the last couple weeks, since diving into this book, that I've been consistently happy with the cups I've been brewing. Our coffee up to this point has been pretty good, occasionally really good, but until recently I often couldn't understand why that distinction was presenting itself. Now I do. I think that this largely comes from the holistic view of the coffee process that I've been introduced to in the pages of this book. James and Caitlin have given me a better idea of how and why coffee is grown, why the art of roasting is truly an art, how to better understand and adapt my brewing methods, and quite a bit more. I could go on and on about the book, but seriously, you should really just preorder a copy. Your coffe will never be the same.

CHEMEX_0002.jpg

Ok. So. The Chemex.

Pour over is Sara and my standard, day to day brewing method. It's a simple, honest process. Approachable enough that even if you've never manually brewed coffee before you can end up with a solid cup your very first try and it's elegant enough that you can spend every morning for the next few years perfecting the execution. Simplicity. Elegance. Perfectly paired ingredients.

What you'll need for this particular method:

The Method (I get kind of wordy, here, sorry, but for those of you who care, hopefully there's something new in here for you. For those of you who don't, the video hits the basics). You'll often find that brewing instructions give all measurements in gram weight, this is for a number of reasons, but most importantly, it allows for consistency and easily defined ratios. This method calls for a 1:10 ratio of coffee grounds to water, so you'll be using 30 grams of coffee beans to yeild 300 grams of brewed coffee (about 10 fluid ounces).

Fill your kettle with approximately 700 grams of water. You'll be using a portion of it to rinse the filter, and part of the water will be absorbed by and remain in the filter and coffee grounds at the end of the process, so you'll need the extra. Start your water (we use a Capresso electric kettle as it brings the water to boil quicker).

Prep the filter. I like to round off the top of the square Chemex filters so that they match the profile of the Chemex itself. This allows me to position the spout of the kettle as close to the ground as possible which makes controling the pour considerably easier. Open the filter and place it inside the Chemex, with the three-walled side of the filter centered over the pouring groove in the Chemex.

Once the water is up to a boil, rinse the filter. Chemex filters have quite a bit of paper mass, so thoroughly rinsing before you brew in them helps wash away the otherwise papery taste they can impart. If you fully remove the filter at this point, you'll have a dickens of a time getting it reseated correctly, so just peel back part the filter and empty the water.

Measure 30 grams of beans then grind. This part takes some experimenting. The basic idea is that a finer grind results in more surface area which results in more extraction. If the water pours through quickly and you get a weak, tasteless cup, you'll want a finer grind; if the water stalls and you find a bitter, over extracted cup, grind a bit courser. For ballpark purposes, in our grinder, the finest being a 1 and the coursest being a 10, I grind at about a 2.5 for Chemex. All grinders are different though, so experiment until you get it dialed.

Add the grounds to the filter then gently groom them until you have a level surface. Try not to compact any part of the grind bed while doing this. Set the whole assembly on the scale and tare.

Prebrew. With the water at 200° (up to 205° for a fresh, light roast, and as low as 190° for a darker roast) add just a small portion of the water to the grounds, about 60 grams in this case, as coffee will hold about twice it's weight in water. You want to add as little as possible while fully saturating the grounds.

Allow the prebrew about 45 seconds (as little as 30 seconds for super fresh beans and up to a minute for a less recent roast), then gently begin to add water in small, concentric circles, in the middle of the grounds, being sure to keep the flow of water away from the sides. As the water level begins to "swell," pause for just a few seconds until the it drains back to the original level of the prebrew. Continue doing this, slowly adding water, while maintaining the same approximate level, until the scale tips 400g, which should take place at about 3:00 on your timer. Again, about 100g of this water will remain in the grounds/filter.

Just before the last of the water dissapears into the grounds, remove and discard the filter (around 3:30).

Pour. Enjoy. Hopefully with cookies.

Print This Recipe

Beverage, Gluten Free, Spring, Summer

RAINIER CHERRY MUDDLER

undefined

Fresh produce makes me giddy. I worked at the organic farm on campus while in college up in San Luis Obispo, and I mark that as the time that I both taught myself to cook, and started to give a second thought to what I was putting in my body. Our wage came in the form of a CSA basket, and every week there was some new type of sprout or a unique type of mushroom. It's fascinating to me - the variety, nutrition and flavors of produce. That fascination can bring a fury of emotions when I read articles on food politics or watch things like Food Inc. or Jaime Oliver's Food Revolution. You matter. What you eat matters. Believe it.

The combination here is a result of last weekends farmers market visit. I use the lemon thyme from my herb garden all the time, but this lemon basil we came across was the most fragrant thing I've ever smelled - only soft notes of traditional basil, more of a lemongrass scent. Hugh keeps commenting on the amazing smell, and he usually saves those compliments for bacon, caramelized onions or double chocolate chip banana bread.

undefined

I also happen to be collecting rainier cherries, grabbing them at every trip to the market, as their season is short. I put these two great finds together in a wheat berry salad with a bit of gorgonzola, but this cocktail is the stunning outcome I wanted to share with you. So pretty! I love pretty drinks. Especially pretty drinks that aren't super sweet, full of simple syrup and soda (anyone? memories of their 21st birthday? maybe something with a marschino cherry? or for my sister, 'dirty bananas,' family vacation in Jamaica circa 2008?). All to say, this is just clean and light and springy and I hope you find a reason to treat yourself to a pretty cocktail. Cheers.

RAINIER CHERRY MUDDLER // Makes 1 Cocktail

Cherries have been on the dirty dozen list, as they are challenging to grow without pesticides. Purchase organic if you can, or be sure to clean them well.

The end result here has some fibrous pieces and bits of turbinado in the glass, it adds character. You could pour it through a mesh strainer if that bothers you.

8 Rainier Cherries

Few Leaves of Lemon Basil

2 tsp. Turbinado Sugar*

2 oz. Vodka

Crushed Ice

undefined

Sparkling Water

1. Pit and halve the cherries. Put the cherries, lemon basil and turbinado in a glass (or pitcher if making more than one), and muddle it with a muddling tool, or the bottom of a wooden spoon. Get aggressive, you need to get as much juice out of the cherries as possible.

2. Fill a glass with 3/4 full with crushed ice. Add the vodka and muddled cherry mix and fill the rest of the glass with sparkling water.

undefined

* I find that rainier cherries aren't quite as sweet as bing cherries, making this drink quite light. If you like a little more tart or sweet flavor, add a splash of cherry juice to the glass.

Print This Recipe